Manual Visual Inspection (MVI) in PCBA Quality
You use manual visual inspection to keep quality high in printed circuit board assembly. This method is the main way to check PCBs. Skilled technicians look at each board. They search for missing parts or parts that are not lined up right. Manual visual inspection is still important, even with more automation. You find problems with the board’s structure early in the design. You also give helpful feedback during manufacturing. This process helps you remove bad boards before testing. Skilled inspectors often see problems that machines do not catch.
Inspection Method | Defect Detection Rate | Error Rate |
|---|---|---|
Automated Optical Inspection (AOI) | Above 95% | N/A |
Manual Visual Inspection | N/A | 10-20% |
Manual visual inspection is very important for checking early design changes.
You find manufacturing problems early, which saves a lot of time.
Key Takeaways
Manual visual inspection (MVI) is important for finding defects early in printed circuit board assembly. It helps save time and resources.
Using a checklist and looking at a 'Golden Board' makes inspections better. It lowers the chance of missing defects.
Regular training and comfortable workspaces help people inspect more accurately. They also lower mistakes during MVI.
Manual inspection works well with automated methods. This helps find more defects and improves quality control in PCB manufacturing.
Manual Visual Inspection Purpose
What Is MVI
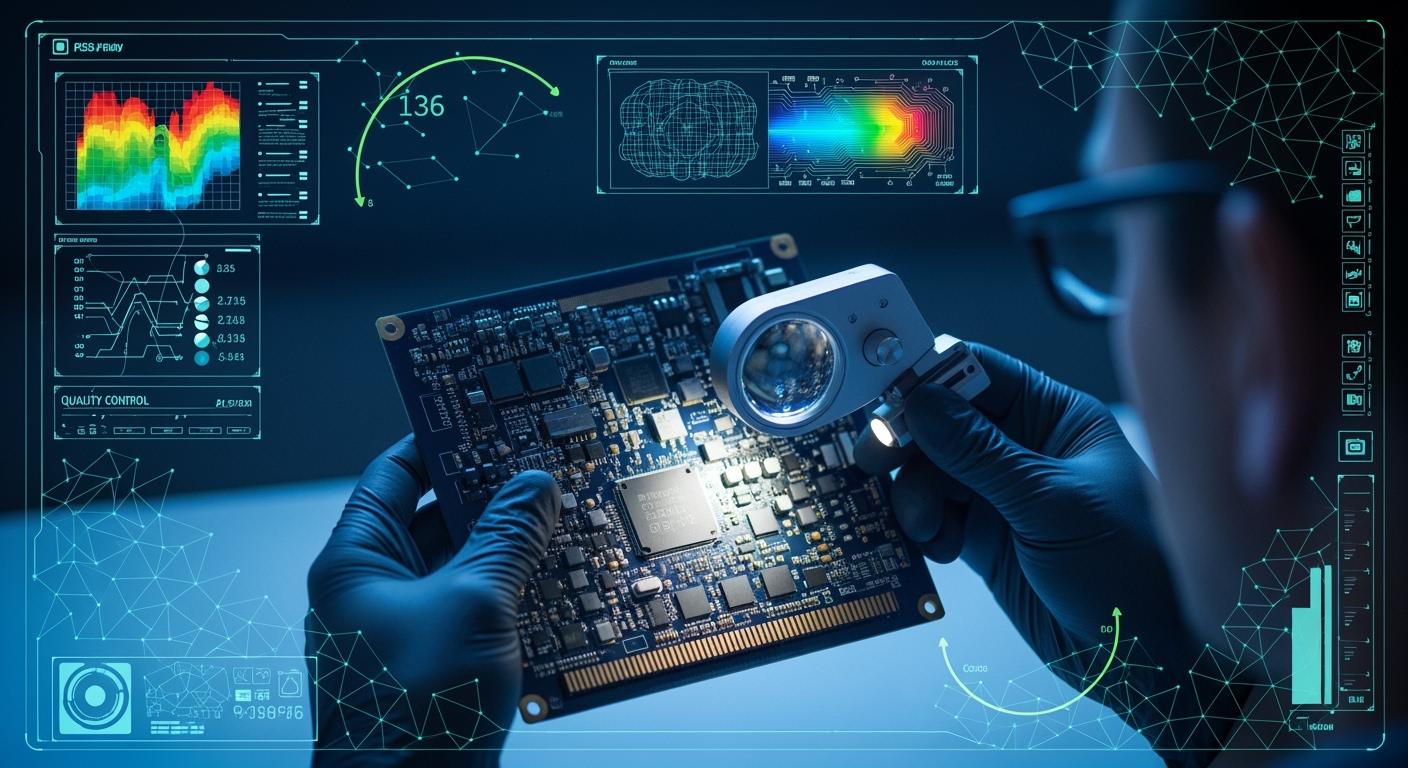
You use manual visual inspection, or MVI, to check printed circuit boards for problems before they move to the next step. In this process, you look at each pcb closely. You compare it to a reference board, called a "Golden Board," or follow a checklist with clear inspection points. You may use a microscope to see small details. This helps you spot defects early and make sure the board meets your standards for quality control.
Role in PCBA Quality
MVI plays a key role in keeping quality high during manufacturing. You act as the first line of defense against defects. Many problems, like missing parts or misaligned components, are easy for you to see. You can also find issues that machines might miss, such as slight discoloration or uneven solder paste. MVI works well for small projects because it does not need expensive equipment. You rely on your skills and attention to detail. When you inspect boards early, you save time and effort in later testing and debugging.
Tip: Use MVI during early production runs to catch mistakes before they become bigger problems.
Objectives of MVI
You have clear goals when you perform MVI for quality assurance:
Make sure each board matches the design specifications.
Find defects that could hurt how the product works.
Check the thickness and surface of the board for rough spots or warping.
Measure the assembly to see if it fits the required size.
Inspect the paths that carry electricity for breaks or other issues.
Look at the surface coatings and pad plating for good coverage.
MVI helps you meet industry standards, like IPC-A-610, by finding defects early. This approach supports strong quality control and works well for prototypes or small batches. Your careful inspection keeps the final product reliable and safe.
PCB Visual Inspection Process
Step-by-Step MVI
You follow steps to check each board for problems. This helps you find issues early and keep quality high. You start with a checklist to guide you. Here is how you usually do pcb visual inspection:
Initial Inspection
You look for things like scratches, dents, or cracks. You check the board’s surface for any damage.Component Inspection
You make sure each part matches the checklist. You check if the part numbers are right and if parts are lined up. You compare the board to a Golden Board, which is a perfect example.Soldering Inspection
You look at solder joints for cold solder, bridging, or missing solder. You use tools that make small things look bigger.Final Inspection
You do a last check of the finished pcb. You make sure all parts are in the right place and soldered well.
You repeat these steps for every board. Skilled technicians are important because they find problems machines might miss. You use your training and pay close attention to details.
Tip: Always use a checklist and compare to a Golden Board so you do not miss problems.
Tools and Techniques
You use different tools and ways to make pcb visual inspection better. These tools help you see small problems and be more accurate.
Magnification Tools
You use magnifying glasses or digital microscopes. These tools make things look 5 to 10 times bigger. This helps you see tiny problems in solder joints and parts.Proper Lighting
You need bright lights, at least 1000 lumens per square meter. Lights at an angle help you see solder bridges and surface problems.Systematic Scanning
You scan the pcb in a grid, starting at the edges and moving in. This way, you check every part of the board.Documentation
You write down all problems you find. Keeping good records helps you track quality and make pcb inspection better next time.
You use these ways to check prototypes and small groups of boards. You can see small problems that machines might not find. Trained technicians use their eyes and tools to spot issues.
Note: Magnification tools and Golden Boards help you check if parts are in the right place and facing the right way.
Inspection Criteria
You follow strict rules during pcb inspection. These rules help you know if a board passes or fails. You use a checklist to help you decide.
Rule | Recommended Value/Range | Why it matters | How to verify |
|---|---|---|---|
Solder Wetting | Contact angle < 90° | Makes a strong bond | Microscope at 45° angle |
Component Polarity | Notch/Dot matches silkscreen | Stops circuit failure | Compare part marking |
Component Alignment | Overhang < 25% of pad width | Keeps parts strong and safe | Top-down magnification |
Solder Bridging | 0% allowed | Stops short circuits | Backlight or angled ring light |
Solder Balls | None > 0.13mm | Stops shorts later | High-mag scan, brush test |
Through-Hole Fill | > 75% vertical fill | Makes sure connections are good | Side view or X-ray sample |
You look for common problems during pcb visual inspection. These include parts not lined up, broken paths, dirty spots, and burn marks. You use your checklist so you do not miss anything.
Alert: Always check for solder bridging and part polarity. These problems can make the board fail right away.
You follow the pcb inspection steps one by one. You use tools and good ways to be more accurate. You use your checklist and rules to keep quality high. Skilled technicians make pcb visual inspection a good way to find problems and make pcb inspection better.
MVI Benefits
Defect Detection
Manual visual inspection helps you find many types of defect in pcb assembly. People can spot about 70-80% of defects during normal work. This means you catch most problems before they get worse. Many pcb defects are easy to see with your eyes or a magnifier. You often notice solder problems, missing parts, and parts that are not lined up. Even if you use machines, you still need people to check. Some defects are hard for machines to find.
You can find:
Solder bridges
Cold solder joints
Component polarity errors
Surface scratches or cracks
Tip: Use manual inspection to check spots that machines might miss.
Flexibility
Manual visual inspection lets you work with many pcb designs. You can change your checks fast when the design changes. Skilled workers can see problems that machines might not find. This method is good for small jobs or special pcb designs. You do not have to change machine programs or wait for new setups. You can change your checks to fit each job.
Cost-Effectiveness
Manual inspection costs less to start than using machines. You only need simple tools like magnifiers and lights. The table below shows how much each method costs:
Inspection Method | Initial Cost | Operational Cost per Board (for 10,000 boards) |
|---|---|---|
Automated Optical Inspection (AOI) | $50,000 - $200,000 + $5,000 - $10,000 (setup/training) | < $0.10 |
Manual Inspection | < $500 (tools) + $20/hour (labor) | $0.40 |
Manual visual inspection is easy to use. You can check things like board shape, size, and solder joints. You use a checklist so you do not miss any defect. Manual inspection takes more time and money for big batches, but it is good for small jobs. You get a simple way to keep quality high without spending a lot.
Note: Manual inspection saves money for small projects, but you should use machines for big jobs.
MVI Challenges
Human Error
Human error is a big problem in manual visual inspection. When you check pcb assemblies, mistakes can happen for many reasons. You might miss small defects if you feel tired. If you do not have enough training, you may misread design files. Misreading files can cause you to put parts in the wrong place.
Human error makes your inspection less reliable. If you place a part wrong or miss loose solder, you can cause defects. These defects can make the product not work right. Training and certification help you avoid these mistakes. When you know what to look for, you find more defects and get better results.
Tip: Regular training helps you stay skilled and spot problems faster.
Fatigue
Fatigue hurts your focus during pcb inspection. If you work long hours or check many boards, you lose attention. This makes it easy to miss cracks or missing parts. Your inspection gets less accurate when you feel tired, especially in busy places. You may miss small defects that cause bigger problems later. Taking breaks and changing tasks helps you stay alert and keep your inspection good.
Subjectivity
Subjectivity means you and another inspector may not agree on what is a defect. This can make your inspection results less steady. Fatigue, different standards, and bias all affect your work. The table below shows how these things change your inspection:
Factor | Impact on Consistency |
|---|---|
Inspector Fatigue | Error rates go up by 20% after 30 minutes of work. |
Differing Standards | Two inspectors may not agree on passing criteria. |
Unconscious Bias | Inspectors may change standards based on expectations. |
You can use tools like automatic optical inspection and laser detection systems to help with subjectivity. These systems help you find defects in pcb assemblies faster and more accurately. When you use your skills with these tools, you make your inspection more consistent.
Optimizing Manual Visual Inspection
Training
You must get good training to do manual visual inspection well. Training teaches you how defects look and how to use tools. You work with real boards and learn from experts. When you know what to look for, you find problems faster. You also get better at checking boards. Good training helps you make fewer mistakes and keeps the inspection strong.
Tip: Try different boards so you can see many defects.
Standardization
Standardization helps make your inspection more steady. You use checklists and clear rules for every board. This helps you look at the right spots and not miss defects. When you follow the same steps, you make fewer mistakes. Standard rules help you check boards better and keep your work good. You also make sure all inspectors check boards the same way. This makes the inspection process steady and trusted.
Ergonomics
You need a comfy workspace to do good visual checks. If you sit or stand the right way, you do not get tired fast. Use chairs that help your back and tables at the right height. Good lights help you see small details without hurting your eyes. Take short breaks to rest your hands and eyes. When you feel comfy, you stay focused and find more defects.
Ergonomic Tip | Benefit |
|---|---|
Adjustable chairs | Less back pain |
Proper lighting | Easier defect detection |
Anti-fatigue mats | Less leg tiredness |
Regular breaks | Better focus |
Integration with Automation
You can make your inspection better by using both manual and machine methods. Here are some best ways to do this:
Pick the right inspection method for each board. Use simple systems for easy boards and advanced ones for hard boards.
Connect inspection data to your factory system. Check boards at different times.
Change machine settings to find the right defects and stop false alarms.
Clean and check your machines often to keep them working well.
When you use both manual skills and machines, you get better checks and higher quality. You find more defects and make your inspection process stronger.
Manual visual inspection helps you keep PCBA quality high. You can find problems early and check if each board is good. To do your best, practice often and use checklists. Make sure your workspace is comfortable. Use MVI with machines to be even more accurate. Your careful work makes electronics safe and reliable every time.
Tip: Check your inspection steps often. Even small changes can make your checks better.
FAQ
What defects can you find with manual visual inspection?
You can spot solder bridges, missing parts, misaligned components, scratches, and cracks. Magnification tools help you see tiny defects. Skilled inspectors often catch problems that machines miss.
How often should you train for MVI?
You should train every six months. Training keeps your skills sharp. You learn new defect types and improve your inspection speed. Regular practice helps you avoid mistakes.
Why do you need a checklist for MVI?
A checklist guides you through each step. You make sure you do not miss any defect. It helps you stay consistent and improves your inspection accuracy.
Can you use MVI for large production runs?
You can use MVI for small batches or prototypes. For large runs, you should combine MVI with automated inspection. Machines speed up the process and reduce errors.
What tools help you during MVI?
You use magnifying glasses, microscopes, and bright lights. These tools help you see small details. Good lighting and magnification improve your inspection results.
See Also
Best Practices for Inspecting Incoming SMC and SMD Materials
The Benefits of X-Ray Inspection for PCBA Quality Assurance
Importance of SPI Visual Checks Post-SMT Solder Paste Application