Functional Testing Fixtures Explained for Modern PCB Projects
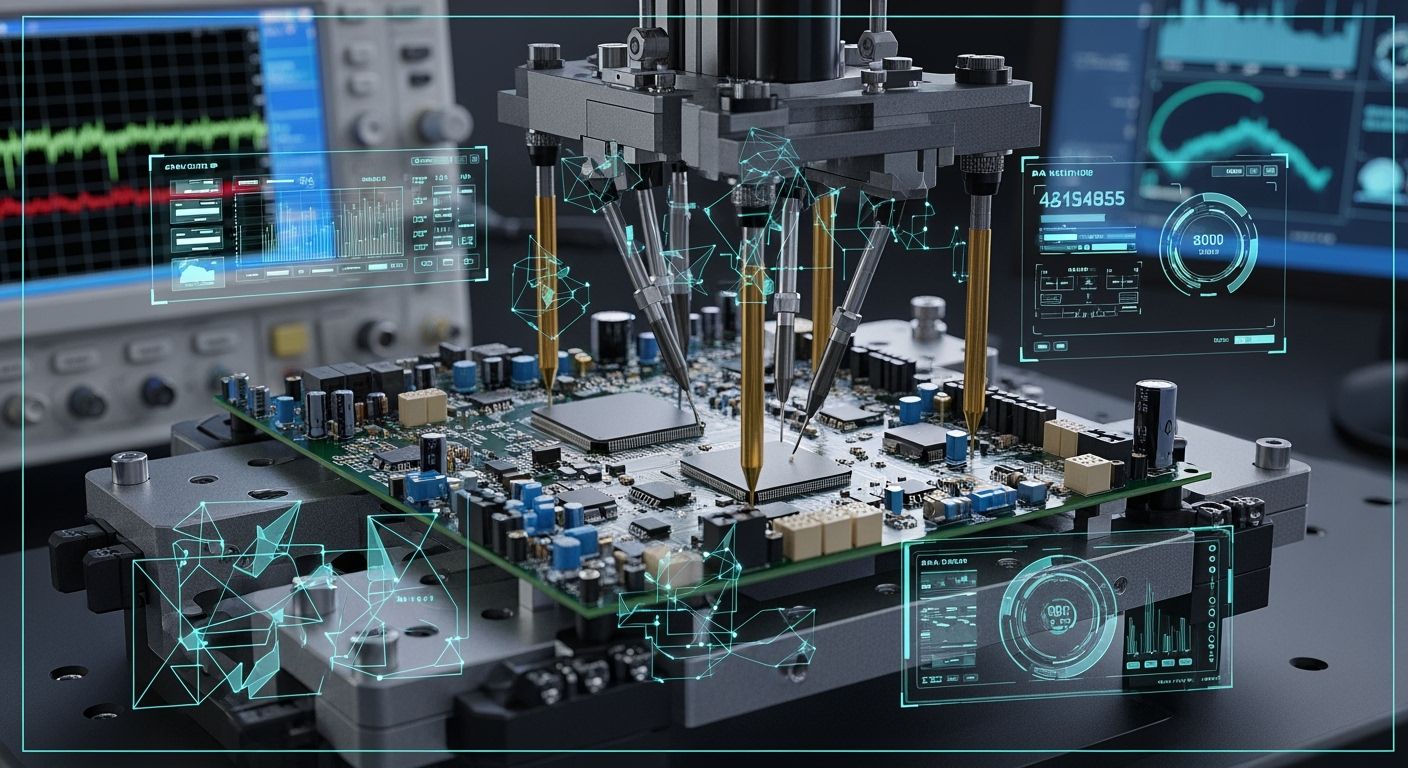
Functional testing fixtures help you see if your pcb works right. You use these tools to make sure each part does its job. Modern pcb designs need functional testing because they are hard and must work well. You have to pretend real-world use and keep things safe and simple.
Functional testing fixtures help you check design rules and make things work better.
These fixtures touch test points the same way each time, so there are fewer errors and better boards.
Automated systems do fast checks, so they are good for testing many boards at once.
Key Takeaways
Functional testing fixtures help check if your PCB works right. They connect the PCB to power and test signals.
These fixtures make testing more accurate and help stop mistakes. This means your product will be better.
Automated testing systems make testing faster. You can test many boards quickly and easily.
Pick the right fixture based on your PCB's size and how complex it is. Modular fixtures are good if you need flexibility.
Add safety features like ESD protection and safety locks. These keep the tester and the PCB safe during testing.
Functional Testing Fixtures Overview
Definition and Purpose
Functional testing fixtures help you check if your pcb works right. These tools let you connect your board to power and test signals. You use them to see if each part does its job. A pcb test fixture holds your board steady. This makes your test results the same every time.
Here are the main types of fixtures you might use:
Category | Definition | Application |
|---|---|---|
Pretend real use, connect PCB to power, and check if it works. | Used at the end to check if everything connects and works. | |
Custom Test Fixtures | Made for special PCB needs, with extra features. | Used when regular fixtures do not work, good for tricky or expensive PCBs. |
You use these fixtures to:
Make sure your board works in the right test setup.
Keep testing steady and easy to repeat.
Hold your board tight, give good connections, and show clear pass or fail.
Tip: A good fixture makes testing quicker and more trustworthy.
Importance for Modern PCB Projects
Modern boards have lots of layers and tiny parts. You need functional testing to check if everything works together. These fixtures help you test parts you cannot reach by hand. You can test many boards fast and safely.
Feature | Description |
|---|---|
Repeatable testing | You get the same results because the fixture holds the board still. |
High throughput | You can test lots of boards quickly, saving time. |
Comprehensive access | You can reach deep spots in boards that are hard to test by hand. |
Hands-free operation | The fixture can run tests by itself, so you make fewer mistakes. |
Rapid diagnostics | You find problems fast with built-in checks. |
Protection from damage | The fixture keeps your board safe while testing. |
Long term stability | The fixture stays accurate even after many uses. |
Scalability | You can add more test points as your project grows. |
You need these fixtures for projects with lots of parts or when you want your product to last a long time. You see them in things like microcontrollers, IoT devices, and car electronics.
Functional Testing in the PCB Workflow
Workflow Role
Functional testing fixtures are used at an important step in the pcb workflow. These tools help you check if your board works before you send it out. You want your pcb to meet all its design goals. Functional test fixtures let you pretend how your board will work in real life. You can see if it turns on, runs its programs, and connects to other devices.
Note: You use these fixtures mostly during the functional testing step. They are made for your board and help you find problems early.
Functional testing fixtures have main jobs in the workflow:
Pretend the real environment for the pcb
Check if the board meets its goals
Make sure the pcb works in real situations
Using a pcb test fixture makes your testing more trustworthy. You also save time because you do not check each part by hand.
Typical Test Processes
You follow steps when you do functional testing. Each step checks a different part of your board. Here are some common steps you might use:
Check power-up steps
Test voltage control
Look at signal quality
Check how devices talk to each other
Run firmware tests
Test how sensors react
Measure how well outputs work
You may use extra tests to find hidden problems:
X-ray checks for hidden issues
Solder tests to see if parts stick well
Contamination tests for leftover stuff
Micro-sectioning to look inside
Peel tests for sticky strength
These steps help you find problems before your product leaves the factory. You make sure your pcb is safe, strong, and ready for real use.
Types of Functional Test Fixtures
Manual Fixtures
Manual fixtures are simple tools for testing your pcb. You use them when you want to test a few boards. These fixtures are good for prototypes or small groups of boards. You do each test by hand, so you control every step. Manual fixtures are great if you need to change things often.
Here is a table that shows how manual fixtures and automated fixtures are different:
Feature | Manual Functional Test Fixtures | Automated Fixtures |
|---|---|---|
Cost | Good price for small amounts | More expensive to set up |
Flexibility | Very easy to change and use | Not as easy to change |
Speed | Slower, you do it by hand | Faster, good for many boards |
Setup | Easy to set up, good for new boards | Harder to set up, needs programming |
Manual fixtures let you test each pcb by hand. You can use a bed-of-nails fixture to touch many spots at once. This helps you check lots of things without special machines.
Automated Fixtures
Automated fixtures make testing quick and correct. You use them when you have many boards to test. These fixtures run tests by themselves, so you do not need to watch. Automated fixtures help you get data and make your work better.
Automated functional test fixtures test fast and give correct results.
You make fewer mistakes and get better answers.
The fixtures help you collect data for checking quality.
You see automated fixtures in big factories. A pcb bed of nails test fixture touches many points and checks the board fast. You get good results and save time.
Modular and Custom Fixtures
You use modular and custom fixtures for special pcb designs. These fixtures fit your board and help you reach hard spots. Modular fixtures let you swap parts easily. Custom test fixtures help you test better and make more boards faster.
You make fewer mistakes and spend less money over time.
You make your boards more alike and check quality better.
Modular fixtures help you make more boards with machines.
Functional testing fixtures help you pick the best tool for your job. You get better tests and keep your boards safe.
Key Components of Functional Testing Fixtures
Test Points and Probes
You need good contact with your board when testing. Test points and probes help you do this. A pcb bed of nails test fixture uses many pins. These pins touch different spots on your pcb at the same time. If one probe does not touch, the board fails the test. You must try again if this happens. How you set up the probes changes your test coverage and accuracy.
Tier Type | Description |
|---|---|
Fixed per fixture | Offsets for each board, like plate drilling and guide pin spot. |
Fixed per board lot | Offsets for a group, like tooling hole spot. |
Random per insertion | Offsets that change each time, like probe tip movement. |
You want all probes to touch at once for a good test.
Mechanical Alignment
Mechanical alignment keeps your board in the right spot. You use levers, air systems, or pin blocks to hold the pcb still. Some fixtures use vacuum or locks for extra grip. A bed-of-nails fixture has a strong base and guide pins to line up your board. Good alignment gives you repeatable results and stops damage.
Manual lever or air actuation
Special pin blocks
RF shielding for sensitive boards
Mechanical locks for stability
Electrical Interface
The electrical interface connects your board to test tools. You need strong grounding to cut noise and keep signals clean. Shielding blocks outside interference. Put ground test points near signal test points to keep loop areas small. Use ground pins in cables and follow signal rules to stop signal loss. These steps help you get correct results from your pcb test fixture.
Safety Features
Safety features protect you and your device. Functional testing fixtures often have ESD protection to stop static from hurting your board. Safety locks stop mistakes during testing. Shields keep you safe from high voltage or moving parts. Some custom test fixtures add current limits and other safety steps. These features make functional testing safe and reliable.
Tip: Always check your fixture for the right safety features before testing.
Design Considerations for Functional Test Fixtures
Test Objectives and Simulation
You need clear goals before making a pcb test fixture. Test objectives help you know what to check on your pcb. You can use different ways to set these goals and pretend real-world use. For example, ICT checks each part, like resistors and capacitors. FCT pretends how your device works in real life. You can see these methods in the table below:
Method Type | Description |
|---|---|
ICT (In-Circuit Test) | Checks each part, like resistors and capacitors. |
FCT (Functional Circuit Test) | Pretends real-world use to check how the device works. |
You must make your test design fit each pcb assembly. This makes testing accurate and steady. You need enough test points so the fixture attaches well. You also need to check input and output signals, power stability, communication reliability, and system behavior. Picking software is important. LabView helps you build test programs fast. You can use C, C++, or Python for more choices.
Tip: Pretend real-world use to make tests better and faster.
Safety and Ergonomics
Safety and ergonomics matter when making fixtures. You want to keep people safe and make the fixture easy to use. Remove sharp edges and pinch points. Stop slipping by using textured grips. Add shields to protect from high voltage or moving parts. Use safety locks to stop accidents. Make sure the fixture fits well in your hands or on your workbench.
Remove sharp edges and pinch points
Use textured grips to stop slipping
Add shields for high voltage spots
Install safety locks for protection
Note: Good ergonomics help people feel less tired and make fewer mistakes.
Fixture Stability and Modifiability
Fixture stability keeps your pcb still during testing. You want the fixture to hold the board tight and stop movement. Modifiability lets you change the fixture easily for new designs or repairs. You can see best practices in the table below:
Best Practice | Description |
|---|---|
DUT Compatibility | Make sure the fixture fits the pcb size and shape for good testing. |
Durability and Reliability | Use strong materials that last long and do not break. |
Ease of Maintenance | Make fixtures with easy-to-reach parts for quick repair or replacement. |
Flexibility for Prototyping | Add adjustable or modular parts to fit new designs. |
Cost-Effectiveness | Use modern materials and tech to save money and work well. |
You can use modular parts in custom fixtures to change things fast. Easy-to-reach parts help you fix or replace things without much wait. Adjustable parts let you test different pcb shapes and sizes. These features make testing faster and easier.
Electrical and Mechanical Integrity
You need to check electrical and mechanical integrity to make sure your fixture works well. You can use temperature cycling to test solder joint fatigue. Humidity exposure checks moisture resistance. Vibration testing simulates mechanical stress. Burn-in testing shows long-term reliability. You can see common tests in the table below:
Test Type | Test Condition | Impact |
|---|---|---|
Thermal Cycling | Change PCB temperature a lot | Finds weak solder joints and materials |
Electrical Overload | Pretend power surges or voltage spikes | Checks if parts can handle strong electricity |
Vibration/Shock Testing | Shake or hit the PCB | Checks if the board stays strong and tough |
You can use fast life testing to guess how long your pcb will last. Long-term exposure testing checks how it works over time. Corrosion testing makes sure your fixture works with moisture or harsh chemicals. These steps help you build a strong and reliable fixture.
Tip: Always test your fixture with real-world stress to make sure it lasts.
PCB Test Fixture Selection Guide
Selection Checklist
You need a simple checklist when picking a pcb test fixture. This helps you make good choices and test better. Here are some easy steps to follow:
Choose the tests you need, like in-circuit or optical.
Find the important nets that need full testing.
Write down what you need and tell your team.
Add test points that are easy to reach on key nets.
Put parts so they do not block test points.
Design for in-circuit testing with the right pads.
Use clear marks to help with optical checks.
Plan for functional testing with connectors and tools.
Lower signal problems during testing.
Write simple test rules.
Check your design for test rules before you finish.
Tip: A good checklist helps you find problems early and keeps your pcb safe.
Best Practices
You can use best practices for pcb test fixtures to help your project. These steps make things easier and help you avoid mistakes.
Talk to your manufacturer early to fit their process.
Share files and details, like Gerber files, as soon as you can.
Check trace width, spacing, and via size to match what your manufacturer can do.
Pick materials that fit your board, like low-loss laminates for fast boards.
Keep your pcb layout balanced and keep analog and digital grounds apart.
Use panelization to make more boards at once and protect them.
Make sure your Gerber files are clean and correct.
Note: Using these best practices for pcb test fixtures saves you time and money.
Common Pitfalls
You might have problems if you do not plan well. Here are some common mistakes and how they can hurt your project:
Common Pitfalls | Description |
|---|---|
Ignoring fixture constraints | Not all fixtures work with the same probe space or board size. Check what your fixture can do before you finish your design. |
Overlooking silkscreen clarity | Bad or missing labels for test points can confuse people and slow setup. |
Neglecting mechanical stress | Probes can hurt small test pads or vias. Make sure pads are strong so they do not crack. |
⚠️ Stay away from these mistakes to keep your functional testing safe and fast.
Integrating Functional Testing with Other Methods
ICT and Boundary Scan
You can make your pcb test fixture better by using functional testing with ICT and boundary scan. ICT checks each part on your pcb. Boundary scan uses virtual test points to reach places you cannot touch. Using both methods together helps you find more problems and fix them faster.
Here is a table that shows why combining these methods is helpful:
Advantage | Description |
|---|---|
Extended test coverage | Boundary scan lets you test hidden spots. Bed-of-nails probing finds open circuits. |
Reduced costs | Early tests catch problems, so fewer boards fail later. |
Improved fault diagnostics | You can locate faults quickly, making debugging easier. |
Simplified testing elsewhere | Early tests make later functional tests simpler and cheaper. |
No interdependence between tests | Boundary scan finds issues even if the board does not work fully. |
Tip: Boundary scan can check for faults before your board turns on. This saves time and helps you fix problems early.
Workflow Optimization
You can make your testing process easier by using different methods together. Modern pcb designs are hard, so you need smart ways to test them. You can use functional testing, environmental stress testing, boundary scan, and in-circuit functional testing.
Here is a table that shows how these methods help your workflow:
Testing Method | Description | Benefits |
|---|---|---|
Functional Testing | Checks board performance in real-world conditions | Better reliability, faster time-to-market, cost savings |
Environmental Stress Testing | Tests durability under tough conditions | Finds weak spots, improves durability |
Uses built-in circuits to check connections | Complements other tests, improves effectiveness | |
In-Circuit Functional Testing | Combines ICT and functional testing | Cuts testing time, makes workflow easier |
You can follow these steps to make your workflow better:
Test for real-world performance first.
Find issues that basic electrical tests miss.
Make sure your pcb works before you finish your product.
Note: Automated systems cost more at first, but they help you test faster and make fewer mistakes. You save time and money by finding problems early.
Cost and Implementation Challenges
Budgeting and Customization
When you plan a functional test setup, you must think about cost. Many things can change how much a pcb test fixture costs. The size and how hard your pcb is will change the price. If your board is special, you may need a custom fixture. Custom fixtures usually cost more money. Changes during production can be expensive, especially for in-circuit testing. It is best to use these fixtures for products that do not change much.
Here are some common cost factors you should think about:
Big or tricky boards need bigger, better fixtures.
Custom setups cost more because each board needs something special.
Changing fixtures after production starts can cost a lot.
Fixtures for finished products save money, but early changes cost more.
Tip: Plan your fixture early and keep your design steady to save money.
Standardization vs. Flexibility
You must pick between standardization and flexibility when you choose a testing method. If you use a bed-of-nails fixture, you get fast and good results for big groups of boards. But if your design changes, you must rebuild the fixture. This takes time and costs more money. Flying probe testing gives you more flexibility. You only need to update the test program for new board layouts. This works well for prototypes or small batches.
You can use this table to compare both choices:
Method | Best For | Flexibility | Speed | Cost for Changes |
|---|---|---|---|---|
Bed-of-nails Fixture | Large-scale production | Low | Very Fast | High |
Flying Probe Testing | Prototypes, small runs | High | Slower | Low |
To get the best results, you should:
Make sure your board has test points that are easy to reach.
Work with fixture makers to balance cost and test coverage.
Use dual-sided fixtures for boards with parts on both sides.
Note: Think about what your project needs. If you want speed and lots of boards, standard fixtures are best. If you need to change things fast, pick flexible solutions.
Good functional testing fixtures help you make strong pcb products. You can make your boards better and spend less money by testing well and checking if they pass or fail. Where you put test points and how you keep signals clear makes tests safer, more correct, and faster.
You can follow these steps to make your testing better:
Set easy-to-understand test goals and checks.
Look at your pcb and how you build it.
Pick the best fixture, like a flying probe test fixture, for your job.
Get help from people who know what they are doing.
Make a plan to add and check your tests.
Keep your tests good by turning on power, checking current, measuring signals, and using both looking and working tests. Check your plans often so your functional testing stays useful.
FAQ
What is a functional testing fixture?
A functional testing fixture is a tool that helps you check if your PCB works as it should. You use it to connect your board to power and test signals in a safe and repeatable way.
Why do you need functional testing for PCBs?
You need functional testing to make sure your PCB works in real life. This testing helps you find problems early. It also keeps your boards safe and improves product quality.
How do you choose the right test fixture?
You should look at your board size, test points, and how many boards you need to test. Talk to your manufacturer and use a checklist to make the best choice.
Can you reuse a test fixture for different PCBs?
Usually, you cannot reuse a fixture for very different boards. If your boards are similar, you can use modular or adjustable fixtures to save time and money.
What safety features should you look for in a test fixture?
ESD protection
Shields for high voltage
Safety locks
Textured grips
These features help you stay safe and protect your board during testing.
See Also
5 Innovative Testing Techniques for Through Hole PCB Assembly
The Comprehensive Process of PCBA Services from Start to Finish
7 Essential Quality Control Steps in Through Hole PCB Assembly
The Impact of Quick-Turn PCB Prototypes on Project Efficiency
