How to clean the pcb board after smt assembly
Cleaning the PCB board after SMT assembly is crucial. It helps ensure the board operates efficiently and has a longer lifespan. Neglecting this step can lead to significant issues:
Residual flux can create conductive paths, resulting in short circuits.
Dirt and residue can compromise protective coatings, reducing their effectiveness.
Microscopic metal growths can cause failures and lead to costly repairs.
By taking the time to clean the PCB board properly, you ensure that devices function optimally and endure over time.
Key Takeaways
Cleaning the PCB board after SMT assembly stops rust and makes it last longer. Cleaning often removes dirt and flux that can harm it.
A clean PCB board works better. Taking off dirt helps electricity flow and avoids short circuits.
Use the right cleaning ways like hand cleaning or ultrasonic cleaning for good results. Always stay safe to protect the board and yourself.
Why It’s Important to Clean the PCB Board After SMT Assembly
Preventing Corrosion and Long-Term Damage
Cleaning the pcb board after SMT assembly keeps it safe from damage. Residual flux left from soldering can stay on the board. If not cleaned, this flux reacts with air moisture and causes corrosion. Over time, this weakens the board and harms its strength.
Cleaning removes flux, which often leads to corrosion.
Humid places can speed up damage if dirt is present.
Some soldering methods leave more flux than others.
Cleaning stops problems like coating blisters and keeps the board strong.
Tip: Clean the pcb board right after assembly to avoid corrosion.
Ensuring Optimal Electrical Performance
A clean pcb board helps your device work better. Dirt and flux can create layers that block electricity. These layers can cause short circuits and reduce performance.
Cleaning is key to keeping electronics high-quality.
A clean surface improves how electricity flows on the board.
Removing dirt boosts the board's stability and conductivity.
Contaminants Removed | Impact on Performance | |
|---|---|---|
Engineered PCB Cleaning Solutions | Improves reliability for important applications | |
High-precision cleaning methods | Fine contaminants | Enhances conductivity and stability |
Smaller devices have less space between conductors. This raises the chance of problems from dirt. Cleaning the pcb board avoids these risks and keeps devices working well.
Enhancing Product Reliability and Lifespan
Cleaning the pcb board makes it last longer and work better. Dirt can cause bad signals and device failures. Removing dirt makes the board stronger and less likely to fail early.
Good cleaning methods, like plasma cleaning, help coatings stick better. These coatings stop leaks caused by leftover flux. Cleaning protects the board from moisture and keeps it working for a long time.
Note: Cleaning often helps the pcb board last longer and saves money for everyone.
Effective Methods to Clean the PCB Board
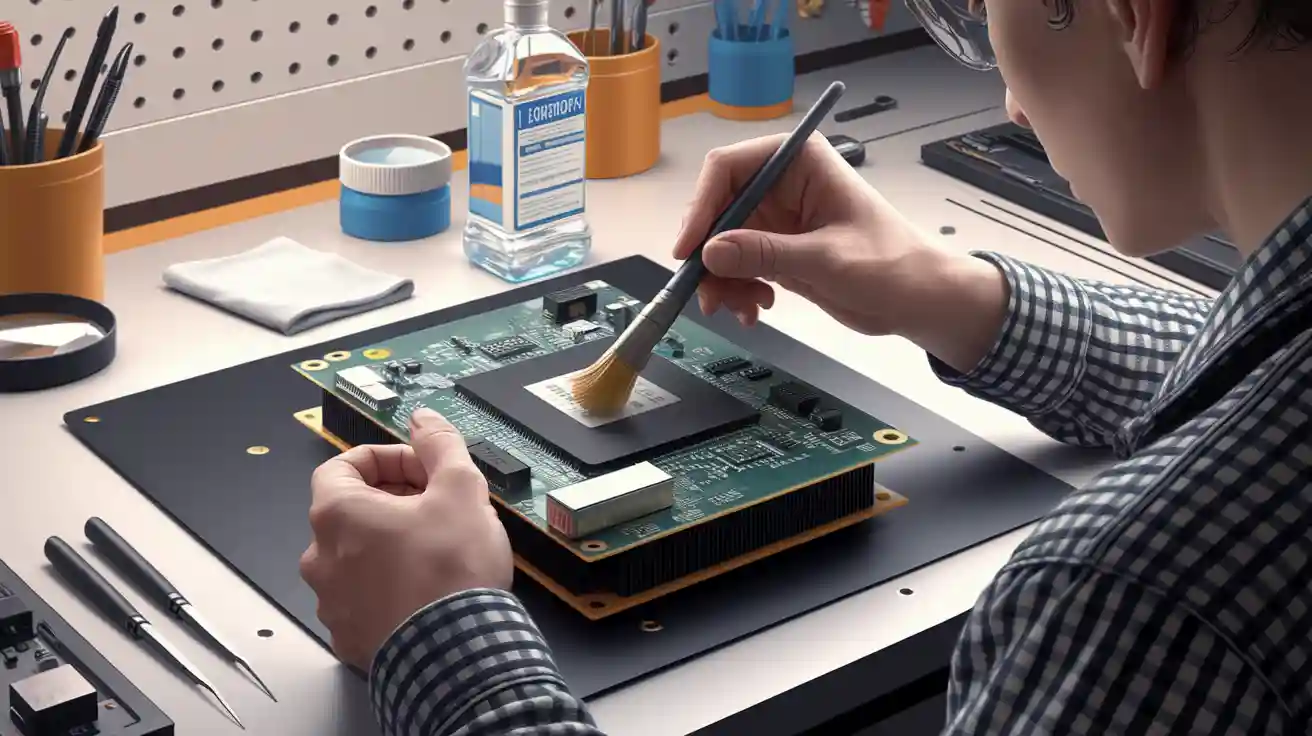
Manual Cleaning Techniques
Manual cleaning is a simple way to clean the pcb board. It works well for small projects or specific areas. Follow these steps for good results:
Soak the board in acetone for 10 minutes to loosen dirt.
Use a soft brush with ethanol to gently scrub the board.
Rinse the board with deionized water for three minutes to clean off chemicals.
Use ethyl alcohol to remove any leftover moisture.
Dry the board completely with nitrogen gas to avoid water damage.
This method lets you clean certain spots but needs careful handling. It’s best for prototypes or boards with little dirt.
Tip: Use anti-static brushes and gloves to stop static electricity during cleaning.
Automated Cleaning Processes
Automated cleaning is great for large production and complex designs. Machines clean the pcb board quickly and evenly. This reduces mistakes and increases efficiency.
Reports show more factories are using automation for pcb cleaning. Special machines handle tiny, detailed designs well. AI is also used to improve cleaning and meet industry rules.
Evidence Description | Key Insights |
|---|---|
Automation in PCB factories | |
Miniaturization challenges | Machines clean small, detailed designs with accuracy. |
AI in cleaning | AI improves cleaning and follows industry standards. |
Need for reliable cleaning | Consistent cleaning keeps quality high and saves time. |
Complex PCB designs | Machines ensure fast and even cleaning for tricky designs. |
Automated cleaning saves time and gives consistent results. It’s the best choice for making many boards.
Ultrasonic Cleaning for Thorough Results
Ultrasonic cleaning is very effective for cleaning pcb boards. It uses sound waves to make tiny bubbles in a cleaning liquid. These bubbles remove dirt from hard-to-reach spots without harming parts.
This method is great for removing solder flux and dust. It’s safe for delicate parts and cleans deeply without touching the board.
Ultrasonic cleaning removes dirt without damaging the board.
It works well for dense pcb designs where dirt can cause problems.
Sound waves create bubbles that clean tiny spaces.
To use ultrasonic cleaning, follow these steps:
Soak the board in acetone for 10 minutes to loosen dirt.
Put the board in ethyl alcohol and use an ultrasonic cleaner for five minutes.
Rinse the board with deionized water for five minutes to remove residues.
Use ethyl alcohol to dry the board and remove moisture.
Finish by drying the board with nitrogen gas.
Ultrasonic cleaning is known for being thorough and efficient. It’s a top choice for industrial use.
Note: Always pick a cleaning solution that won’t harm your pcb board materials.
Tools, Materials, and Best Practices for Cleaning PCB Boards
Important Tools and Materials for Cleaning
Using the right tools keeps the PCB board safe and clean. Always choose tools made for PCB cleaning to get the best results.
Use ESD-safe tweezers to pick up small debris.
Ultrasonic cleaners clean many boards deeply and quickly.
Automated systems are great for cleaning large batches of boards.
Wear ESD gear to protect delicate parts from static.
Turn off and unplug the board before starting to clean.
Discharge big capacitors to stay safe while handling the board.
Tools and Materials | Purpose |
|---|---|
Ultrasonic Cleaners | Deeply clean boards with even energy spread. |
Cleaning Solutions | Match solder residue for better cleaning. |
Cleaning Steps | Include rinsing and testing for thorough results. |
Safety Tips for Handling Fragile Components
Be careful when working with PCB boards to avoid damage. Follow these safety tips to keep the board and yourself safe:
Wear anti-static straps to stop static from harming parts.
Don’t use water-based cleaners to avoid rust.
Handle parts gently to prevent scratches or cracks.
Use tools like cotton swabs and alcohol for cleaning.
Keep your workspace tidy to avoid dirt.
Store the board in a dry place when not in use.
Follow the maker’s instructions for cleaning and handling.
Safety Tip | Why It’s Important |
|---|---|
Avoid Contamination | Stops dirt from hurting performance. |
Prevent Damage | Protects the board from scratches. |
Stop Static Problems | Keeps parts safe from static electricity. |
Avoid Moisture Issues | Prevents peeling and bad soldering. |
Drying the Board Completely and Avoiding Moisture
Make sure the PCB board is fully dry after cleaning. This stops moisture from causing problems. Use these drying methods to keep the board working well:
Infrared heaters remove leftover water and trapped moisture.
Warm rinse water, between 75° and 160°F, dries faster.
Nitrogen gas drying removes water without harming parts.
Drying Method | Benefits |
|---|---|
Drying Techniques | Stops moisture from staying on the board. |
Infrared Heaters | Removes water quickly and safely. |
Warm Rinse Water | Helps dry the board better. |
By following these steps, you can clean and protect your PCB board for a longer life.
Post-Cleaning Inspection and Troubleshooting with LTPCBA
Visual Inspection Techniques
After cleaning the pcb board, check it carefully for problems. Start with manual visual inspection. Look at the board closely using your eyes or a magnifying glass. This helps you find dirt, scratches, or solder mistakes.
For better inspections, use Automated Optical Inspection (AOI). AOI uses cameras and software to find issues like missing parts or solder bridges. If your board has hidden solder spots or tightly packed parts, try Automated X-ray Inspection (AXI). AXI uses X-rays to safely find hidden problems without damaging the board.
Inspection Method | Description |
|---|---|
Manual Visual Inspection | Check the board with your eyes or magnifying tools. |
Automated Optical Inspection | Cameras and software find solder and part problems. |
Automated X-ray Inspection | X-rays safely find hidden solder or packed part issues. |
Common Issues and How to Address Them
Even after cleaning, some problems might remain. White marks mean rinsing wasn’t done well. Fix this by rinsing longer or using warmer water. Damaged parts can happen if cleaning gets too hot; lower the heat to avoid this. If cleaning isn’t complete, clean longer or use better tools. Water spots show poor drying; dry the board better to stop this.
Problem | Possible Causes | Solutions |
|---|---|---|
Poor rinsing | Rinse longer or use warmer water. | |
Component Damage | Too much heat | Lower cleaning temperature. |
Incomplete Cleaning | Not enough cleaning time | Clean longer or use better tools. |
Water Spots | Bad drying | Improve drying methods. |
Testing for Cleanliness and Functionality
Testing makes sure cleaning didn’t hurt the board’s performance. Start with a visual check using IPC-A-610 rules. For ionic dirt, use ROSE testing. ROSE checks how clean the board is by measuring ions in a solvent. For important boards, SIR testing checks if dirt blocks electricity flow.
Ion chromatography gives exact results for ionic dirt. These tests follow industry rules like IPC-TM-650. Testing shows the board is clean and works as it should.
Testing Methodology | IPC Standard | Description |
|---|---|---|
IPC-A-610 | Checks cleanliness without magnifying tools. | |
ROSE Testing | J-STD-001 | Measures ionic dirt using solvent extraction. |
Surface Insulation Resistance (SIR) | IPC-9202/9203 | Tests if dirt blocks electricity flow. |
Ion Chromatography | IPC-TM-650 para. 2.3.28 | Measures flux dirt exactly. |
Tip: Pick the right test based on the board’s use and cleaning needs.
Cleaning the PCB board after SMT assembly is very important. It helps the board work well and last longer. Cleaning removes leftover flux and stops rust from forming. It also makes coatings stick better and helps you check for problems easily. Clean boards lower the chance of short circuits. By using good cleaning methods and following IPC rules, you can keep your PCB boards strong and reliable. LTPCBA promises to provide top-quality PCB assembly with strict quality checks.
FAQ
What’s the best way to clean small PCB projects?
For small projects, manual cleaning is ideal. Use a soft brush, rubbing alcohol, and pure water to clean off dirt and flux.
Does ultrasonic cleaning harm fragile parts?
No, ultrasonic cleaning is gentle on fragile parts. It uses sound waves to clean without touching, keeping delicate pieces safe.
How many times should PCB boards be cleaned during production?
Clean PCB boards after each assembly step. This stops residue from building up and keeps the board working well.
See Also
Importance of SPI Inspection Post-SMT Solder Paste Application
Understanding SMT and DIP Assembly for PCBA Processes
Choosing PCB Materials for Effective SMT Assembly Processes