Gaming Console PCBA Manufacturing
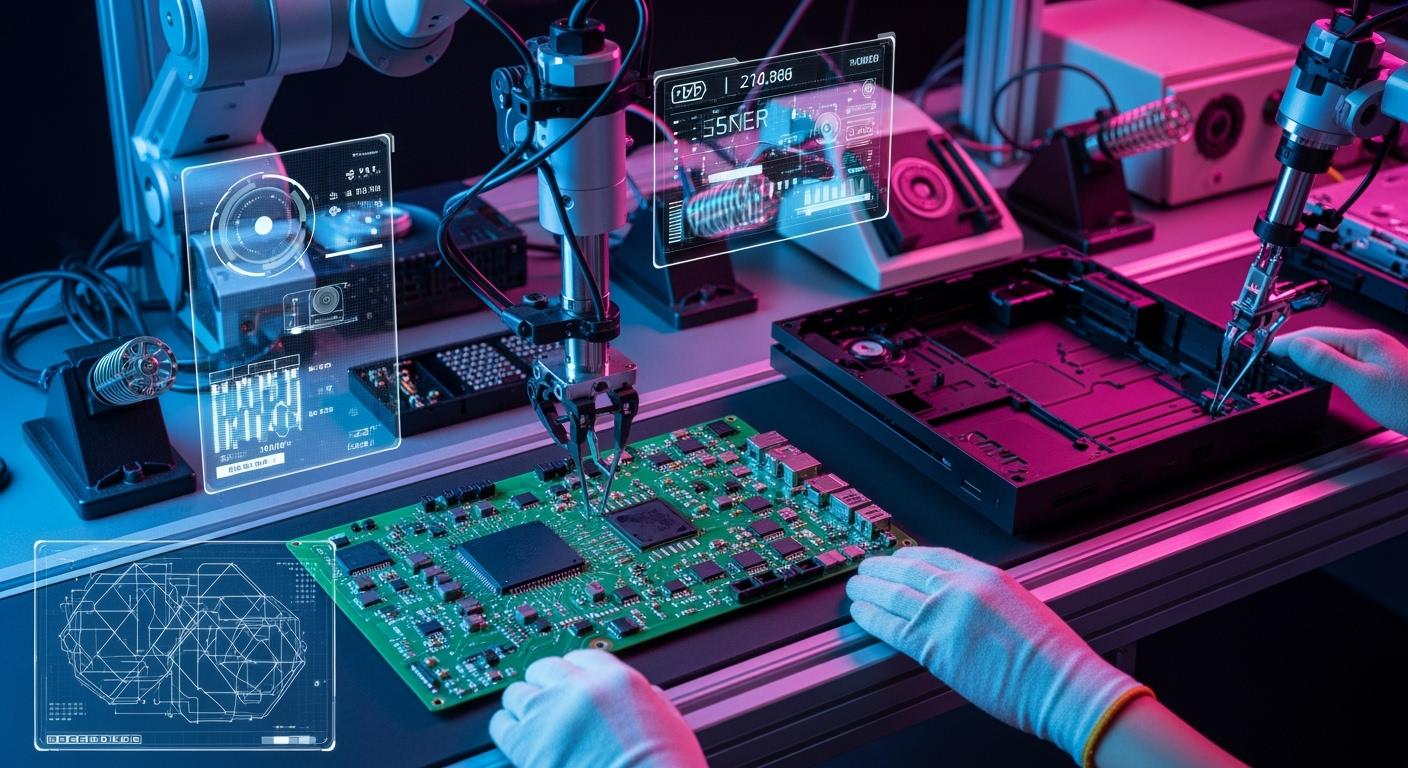
You can think of gaming console PCBA manufacturing as the main part of every gaming device. This process uses special materials and careful assembly to make both new and old games work well. Good PCBA stops problems like short-circuits and rust, which can hurt how the console works and how much fun you have. Studies show that HDI technology and good cleaning help the console last longer and work better.
The worldwide gaming console business may grow to USD 61.2 billion by 2033.
HDI systems use high-Tg surfaces and laser-drilled microvias to stop parts from breaking or coming apart, so your games run better and last longer.
Key Takeaways
PCBA is very important for gaming consoles. It connects all the parts. This helps games run well and work right.
Careful planning and design matter a lot. You need to pick parts carefully. This stops problems from happening later.
Testing and checking quality are key steps. Regular checks find problems early. This makes the console last longer.
New upgrades can make old consoles better. They mix old designs with new tech. This gives gamers a better experience.
Using industry standards keeps things safe and good. It builds trust with customers. It also keeps the console working well.
What Is Gaming Console PCBA
Definition and Key Functions
The PCBA is the main part inside every gaming console. It links all the important pieces that help your game system work. When you play, the PCBA controls the screen, the sound, and the buttons. It puts everything together so your games run smoothly.
A portable game console uses a PCBA to put the screen, sound, and controls on one board. This makes the device lighter and simple to carry.
Here are the main parts and what they do:
Component | Function |
|---|---|
Resistors | Slow down the flow of electricity to keep parts safe. |
Capacitors | Hold and let out energy, which helps clean signals and keep power steady. |
Integrated Circuits | Do hard jobs, like making graphics and sound work. |
Connectors | Join the PCBA to other systems for talking and power. |
You can see how each part works together to make gaming better. The design shows how the microcontroller links to the screen and buttons. Each part is placed carefully on the pcb so nothing gets too crowded and the console stays cool. Trace routing connects all the parts, so signals move quickly and clearly.
Importance for Gaming Devices
A good PCBA helps your gaming console last longer. If you use bad materials or skip careful building, your console might break or not work well. Newer gaming devices need strong connections for playing online. Older consoles need tough boards to keep old games working.
Strong boards let you play for a long time without trouble.
Good signals give you fast and correct controls.
Custom designs help your console follow safety rules in different places.
Better connections let you play online and with friends.
A strong PCBA keeps your portable game console safe from harm and makes sure your games run well. You can count on your console to be fun every time you use it.
Console PCBA Manufacturing Process
Planning and Conceptual Design
When you build a gaming console, you start by making a plan. You set your goals for the project. You decide what your console should do. You pick the most important features. Here is an easy way to plan your portable game console: First, write down what you want your console to do. Next, choose a microcontroller or single-board computer that matches your needs. Pick a display that does not use too much power and fits your design. Plan controls that are simple to use. Add a battery you can recharge so you can take your console anywhere. Put in a microSD card slot if you want more storage. The choices you make now will affect every step after this. Good planning helps you avoid problems later.
PCB Layout and Schematic Design
After you plan, you start designing. You draw a schematic to show how each part connects. Then, you make the pcb layout. This is important for the main board and any custom circuit board. Start by placing the microcontroller and display connector. Group parts that work together to stop noise. Use wide paths for power and ground traces. Add a solid ground plane to lower EMI. Run a Design Rule Check (DRC) to find mistakes before you make the board. You can use tools like Altium Designer, Autodesk EAGLE, KiCad EDA, or OrCAD for custom pcb design. These programs help you make good layouts and avoid errors.
Tip: Always check your design for EMI problems. Use ground planes and manage cables well to keep your console working right.
Component Sourcing and SMT Assembly
Next, you gather all the parts for your pcb. Finding parts can take a long time, especially for special chips or connectors. Sometimes, you wait 12 to 24 weeks for some items. If there are big world events, it can take even longer. So, plan your inventory carefully. Surface Mount Technology (SMT) assembly helps you build your console faster and better. Pick and place machines put parts like resistors and capacitors on the board quickly and correctly. This method is good for making many consoles and keeps mistakes low.
Benefit | Description |
|---|---|
High Efficiency | SMT assembly lets you make consoles faster than old ways. |
High Consistency | It puts parts in the same place every time, so there are fewer mistakes. |
Suitability for Mass Production | It is made for making lots of consoles and saves money when you make many. |
Soldering and Assembly Steps
Now you attach the parts to the pcb. There are different ways to solder parts for strong, clean joints. Selective soldering only heats certain parts, so the rest of the board stays safe. Robotic soldering does the same job over and over with steady quality. Wave soldering moves the pcb over melted solder for fast, strong connections. Hand soldering lets you fix small problems or add special parts. Here is a simple way to put everything together: First, get the pcb and parts ready. Next, put solder paste where you need it. Then, place the parts on the board. Use the best soldering method for each part. Last, check every joint to make sure it is strong and clean.
Programming and Firmware
After you finish putting the console together, you load the firmware onto the main board. Firmware is the code that controls how your console works. It connects all the features. You might have problems like not enough memory, needing security, or new customer requests. Careful coding helps you stop crashes and keeps your game running well. You must balance speed and memory use. Sometimes, you need to update the firmware to add new features or fix bugs.
Testing and Quality Assurance
Testing makes sure your gaming console works well and lasts a long time. You look for problems like broken parts, heat damage, or electrical stress. Here are some common things that can go wrong:
Failure Type | Description |
|---|---|
Mechanical Failure | The board or parts bend, break, or warp. |
Thermal Failure | Parts get too hot and stop working. |
Environmental Failure | Moisture, dust, or heat cause damage. |
Electrical Stress | Static electricity or too much voltage causes problems. |
Aging Failure | Parts wear out after a long time. |
You check for problems during the process to catch them early. At the end, you test if the console works and meets all rules. Managing tolerance stack-up helps all parts fit together without mistakes. Certifications like IPC-A-610 and ISO 9001 show your process is high quality. These help you build trust with customers and keep your quality high.
Final Console Assembly
In the last step, you put all the pieces together. You fit the pcb, display, controls, and battery into the case. You check every part to make sure it fits and works. Here are important checkpoints:
Checkpoint Type | Description |
|---|---|
In-Process Inspection | Finds problems early using vision systems and electrical tests. |
End-of-Line Testing | Checks if the console works and follows safety rules. |
Managing Tolerance Stack-Up | Makes sure all parts fit together without gaps or stress. |
You also think about the environment. Use materials like Sulpac Luxe or Luxe Flex to cut waste and lower pollution. Follow OSHA and EPA rules to keep your workplace safe and green. Many makers now use lead-free solder and halogen-free boards to help the planet. By following these steps, you build a gaming console that is strong, safe, and ready for hours of fun.
Best Practices for Gaming Device PCBA
Design Rules and Standards
When you make a gaming console, you must follow special rules. These rules help keep your device safe and working well. The most important standards focus on quality, safety, and the environment. Here is a table that lists the main standards:
Standard | Description |
|---|---|
IPC-A-600 | Acceptability of Printed Boards, covering visual criteria for PCB acceptance |
IPC-A-610 | Acceptability of Electronic Assemblies, focusing on solder joints |
ISO 9001 | Quality Management System for consistent products |
ISO 14001 | Environmental Management System for sustainability |
UL 796 | Safety Standard for Printed Wiring Boards |
RoHS | Restriction of Hazardous Substances |
REACH | Regulation on chemicals in PCB manufacturing |
Tip: Always check your custom pcb design with these standards. This helps you avoid problems later.
Component Compatibility
You need to make sure all parts work together before building. This step makes it easier to upgrade your portable game console later. You must match voltage levels and pin layouts. If a new part needs a different voltage, use a voltage regulator. Careful planning stops problems and keeps your game running well.
Testing Protocols
Testing is needed for every gaming device. Functional testing checks if your console works right. In-circuit testing uses probes to find problems early. Static burn-in is good for simple boards. Dynamic burn-in is better for complex systems and finds more issues. Add test points to your pcb to make fixing problems easier.
Cost and Efficiency
You can save money and work faster by teaming up with your PCBA supplier. Ask your supplier for ideas early in the process. Share all your data to get better advice. Ask about ways to save money and use their network. Simulation tools help you make better layouts and use less material. Adaptive power management helps your gaming device save energy but still work well.
Note: Flexible production models like High-Mix, Low-Volume help you adjust how many consoles you make. This works for both small and big orders.
You should watch part availability and delivery times. Just-in-time inventory helps you manage money better. Regular checks and audits help you stop defects. Visual checks, power tests, and continuity checks are good ways to find problems.
Retro Game Console PCBA Insights
Unique Design Challenges
Working on a retro game console brings special problems. These problems are not the same as new devices. Many times, old manuals and diagrams are lost. You need to use reverse engineering to figure things out. You must look at the original hardware and learn how it works. This takes a lot of time and patience.
You also have to connect vintage parts to new technology. Sometimes, old chips do not fit with modern boards. You need to fix these compatibility issues so everything works together. If you want the original controller style, you must design custom controllers. These controllers look classic but use new parts inside.
Reverse engineering old hardware
Connecting vintage parts to new technology
Making custom controllers for a classic look
Tip: Take pictures and write notes as you open each device. This helps you remember how all the parts fit together.
Modern Upgrades for Retro Devices
You can add new features to your retro gaming projects. For example, you can give your portable game console an HDMI output. Some builders use a USB-C connector to send HDMI signals from an FPGA chip. They make a custom dock so you can connect to a TV. The dock also manages power and lets you use a microcontroller for communication.
You can add wireless features too. A Raspberry Pi Pico W can give you Bluetooth. This lets you connect controllers without wires. You can play your favorite game on a cartridge system. You get retro gaming with modern comfort.
These upgrades make your old gaming console more fun and useful. You keep the classic look and feel. You also get the power of new technology.
You now know the main steps to build a strong gaming console PCBA. It is important to check your work often and make sure it is good quality. Try using new ways like rapid prototyping, AI checks, and digital twins. These can help you make your console better. Using green methods saves energy and cuts down on waste. Keep learning new things and use these ideas in your own gaming projects to get better results.
Rapid prototyping helps you build faster.
AI can spot problems early.
Digital twins let you plan and test easily.
FAQ
What does PCBA mean in gaming consoles?
PCBA stands for Printed Circuit Board Assembly. You find it inside every gaming console. It connects and controls all the main parts, like the screen, buttons, and sound. Without a PCBA, your console cannot work.
How do you test a gaming console PCBA?
You use special machines to check for broken parts, bad solder joints, or signal problems. You also run the console to see if it works. Testing helps you find and fix issues before you use the console.
Can you upgrade a retro game console with a new PCBA?
Yes, you can upgrade a retro console. You add a new PCBA to get better features, like HDMI or wireless controls. You keep the classic look but enjoy modern technology.
Why do you need quality standards for PCBA manufacturing?
Quality standards help you build safe and reliable consoles. They make sure every board works well and lasts longer. You avoid problems like overheating or short circuits by following these rules.
What is SMT assembly, and why is it important?
SMT stands for Surface Mount Technology. You use it to place tiny parts on the board quickly and accurately. SMT makes your console smaller, lighter, and more reliable.
See Also
Understanding PCBA and Its Key Components Explained
Defining PCBA: Its Meaning in the Electronics Field
Sourcing Electronic Parts for Effective PCBA Production
Enhancing Business Efficiency Through PCBA Contract Manufacturing
Comprehensive PCBA Services: From Production to Quality Testing