BGA Rework Tips for Quick Fixes Now
You want to fix a BGA fast and get reliable results. Start with the right tools and a clear process. Good tools help you avoid common mistakes in bga rework and repair. Use expert shortcuts to work smarter, not harder. Check the success rates for different methods:
Method | Typical Success Rate |
|---|---|
Manual | 70% - 85% |
Semi-Automatic | 93% - 97% |
Fully Automatic | 99.5% - 100% |
Choose the best method for your repair to save time and boost your results.
Key Takeaways
Pick the right tools for BGA rework. A good rework station and the right heating tools help you work faster and better.
Get ready before you begin. Look at the board and collect all tools so you do not make mistakes during the fix.
Make sure the BGA is lined up right before you put it on. Good alignment makes strong solder joints and good connections.
Use a careful heating plan during reflow. This stops weak joints and keeps the board safe from harm.
Check your work after you finish. Use X-ray or endoscope tools to look for problems and make sure the repair worked.
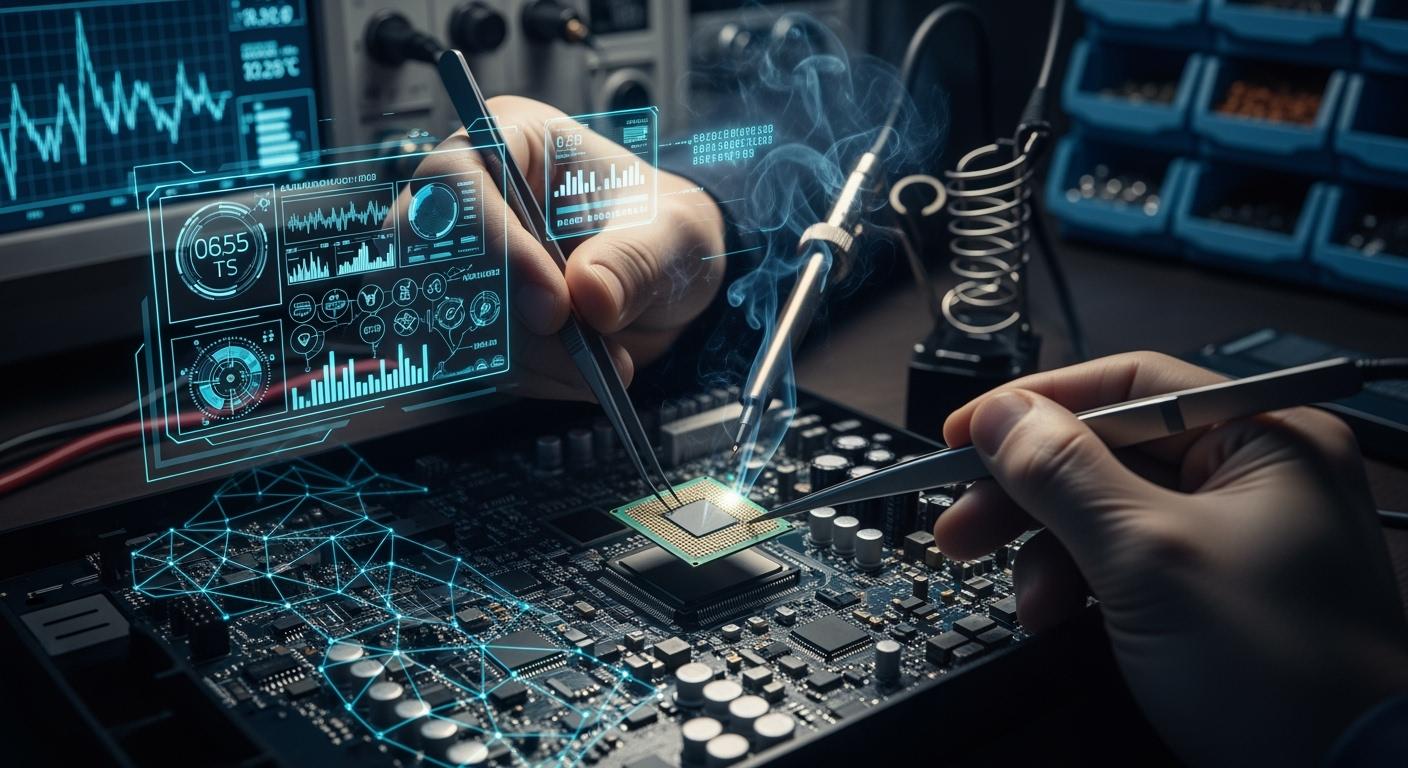
Essential Tools for BGA Rework
Must-Have BGA Equipment
You need the right tools to make bga rework fast and accurate. Professional electronics repair shops use several key items to handle bga components. These tools help you control the process and avoid mistakes.
BGA rework station lets you heat and position bga chips with precision.
Hot air or IR heating source gives you flexible heating options for different bga sizes.
Soldering materials, like lead-free solder paste and flux, create strong solder joints.
Support tools, such as solder wick and microscopes, help you clean and inspect the site.
Tip: Always check your equipment before starting the rework. Clean tools and fresh solder paste improve your results.
Tool Selection for Fast Repairs
Choosing the best equipment for bga rework makes your process faster and more reliable. Modern bga rework stations offer better control and consistent heating. This reduces defects and speeds up the repair. Older tools can cause uneven heating and mistakes, which slow down the process.
Look for tools that match the size and type of bga you need to fix. Pick stations with adjustable temperature and airflow. Use microscopes to check your work and avoid missing small issues. Reliable tools help you finish the rework quickly and keep your repair safe.
Note: Good tool selection means fewer errors and less time spent fixing problems. You get better results and save time.
Quick BGA Rework Steps
Preparation and Assessment
You should get ready before you start bga rework. First, find the faulty bga. Use an X-ray system to look for hidden problems. These can be things like non-wetting or short circuits. Check the PCB and bga for cracked solder joints. Look for any signs that something is wrong. Gather all your materials, like solder paste and cleaning liquids. Make sure your bga rework station works well. Good preparation helps you avoid mistakes. It also makes bga removal faster.
Tip: Always make sure you have the new bga and all tools before you start.
BGA Removal
You need to take off the bga without hurting the board. Use careful heating and gentle lifting to do this. Here are the steps for safe and quick removal:
Step | Description |
|---|---|
Preheat Phase | Slowly heat the board to 100-150°C in 60-90 seconds. This stops thermal shock. |
Ramp to Reflow | Raise the temperature by 2-4°C each second. Do not overheat. |
Liquidus Temperature | Heat to about 220°C so all solder joints melt together. |
Component Lift | Use a vacuum tool to lift the bga straight up. This keeps the pads safe. |
Controlled Cooling | Let the board cool down slowly to stop thermal shock. |
Thermal Shielding | Use shields to protect other parts from heat. |
Nozzle Selection | Pick the right nozzle size to heat only the bga. |
Profile Optimization | Keep the highest temperature and time above liquidus short. |
Component Distance Analysis | Check for important parts near the hot area to keep them safe. |
Note: Heating and cooling the right way keeps your board safe and makes the rework work better.
Site Cleaning and Prep
After you remove the bga, you need to clean the spot. Use cleaning agents like the ones used before. Heavy Duty Flux Remover, No-Clean Flux Remover, and General Purpose Flux Remover are good choices. You can also use vapor defluxing with a mixed solvent. Hydrocarbon blended solvents with low surface tension clean off residue fast. Clean pads help make strong solder joints next.
Take off all old solder and flux.
Check the spot with a microscope for any leftover dirt.
Make sure the area is dry and ready for new solder paste.
Solder Paste Application
You must put on solder paste the right way for bga rework to work. Use a metal or plastic stencil one time only. The stencil matches the land patterns on the PCB. This helps you put paste only where it is needed. Some people use polyimide tape as a semi-permanent stencil. This way, you make fewer mistakes and get better solder joints.
Put the stencil over the clean spot.
Spread solder paste evenly in the holes.
Take off the stencil and check if the paste is in the right place.
Tip: Putting solder paste on the right way stops solder voids and makes repairs faster.
Alignment and Placement
You have to line up the bga just right before you put it down. Manual systems use your eyes or silkscreen marks. Semi-automatic systems use split-vision optics. Fully automatic systems use prisms and lasers for perfect alignment. Good alignment stops solder voids and makes sure the bga sits right. Better alignment means stronger solder joints.
System Type | Alignment Method | Heating Technology | Target Application | Estimated Cost |
|---|---|---|---|---|
Manual | Visual / Silkscreen | Hot Air or Basic IR | Hobbyists, Mobile Repair | $200 - $800 |
Semi-Automatic | Split-Vision Optics | Hybrid IR/Air | IT Repair Shops, Console | $1,500 - $4,000 |
Fully Automatic | Prisms & Lasers | Multi-Zone Hybrid | EMS, Aerospace, Medical | $5,000 - $25,000+ |
Use the best alignment tool for your setup.
Place the bga gently on the solder paste.
Double-check the position before you go on.
Reflow Soldering
You need to heat the solder so the bga sticks. Follow this profile for quick bga repairs:
Preheating: Warm the board to 60°C to 100°C for 45 seconds.
Ramp-up: Raise the temperature to 150-190°C for lead-free solder.
Soak: Hold at 170-185°C for lead-free solder.
Reflow: Heat to 235-245°C for lead-free solder.
Cooling: Let the board cool below the melting point of the solder balls.
Note: Control how fast you heat and cool. If you heat or cool too fast, you can get weak solder joints or cracks.
Keep the board at 110°C to 140°C before reflow.
Do not let the solder ball/board pad get hotter than 205°C.
Keep the time above 183°C for 30 to 60 seconds.
Cleaning and Final Touches
You finish bga rework by cleaning and checking the spot. Use good equipment for steady temperature and alignment. Training helps workers do the job faster and better. Pick the right heat source and nozzle size for even heat. Low temperature and preheating lower stress on the board.
Clean off any leftover flux and dirt.
Check the solder joints to see if they are good.
Test the board to make sure the repair worked.
Tip: Clean and check your work well. This step saves time and makes your repair last longer.
You can finish a bga rework fast and safe if you follow these steps. Each step helps the next one, so your repair is quick and strong.
BGA Rework Mistakes
Common Errors
You can run into many problems during bga rework. These mistakes often slow down your repairs and can damage the board. Here are the most common errors you should watch for:
You might use the wrong removal technique. This can lift pads or damage the board’s laminate.
You may not control the process well. Poor site preparation can lead to weak solder joints.
You can misalign the bga during placement or reflow. This mistake causes poor electrical connections and delays.
You might apply solder paste incorrectly. Too much or too little paste leads to bad joints.
Misaligned components account for about 20% of rework cases in fast production lines.
Tip: Always check your alignment and solder paste before you start the next step.
Prevention and Solutions
You can avoid most mistakes in bga rework by following a few smart steps. Use the best equipment you have. Do not cut corners with tools or settings. Develop a good thermal profile for your board. Bake out moisture from components and protect heat-sensitive parts before you start. Watch out for heat damage to nearby components.
After you place the bga, inspect your work with an X-ray. This helps you catch hidden problems early. If you find a mistake, you can fix it right away. For fully assembled boards, you can use jumper wires to restore connections. For boards that are not fully assembled, you can add flat ribbon conductors and secure them with epoxy.
Here are some strategies that help prevent mistakes:
Strategy | Description |
|---|---|
Use Resin-Filled or Plugged Vias | This improves solder joint reliability and keeps the pad flat. |
Match Pad and Ball Dimensions Early | This ensures the right amount of solder and strong bonding. |
Review Thermal Profiles and Stencil Design | This prevents defects by making sure paste and heat work well together. |
Document Design Rules | This keeps your process consistent and reduces errors. |
Note: Careful planning and inspection make your bga rework faster and more reliable.
Pro Tips and Quality Checks
Speed Shortcuts
You can make bga rework faster by using expert tips. First, preheat the board before taking off the bga. This step helps stop thermal shock and keeps things safe. Use a stencil only once for solder paste. This saves time because you do not need to clean it. It also helps you put the paste in the right place. Pick a rework station that lets you change airflow and temperature. This gives you better heat control and stops mistakes. Keep your workspace neat and tidy. Put all your tools and materials close by. You will not waste time looking for things during repair.
Professional workers buy better tools and keep learning new skills. You should do this too. People with good training finish repairs faster and make fewer mistakes. Use a microscope to check your work after placing the bga. You can find alignment problems early and fix them before reflow. Always write down what you do. This keeps your work steps the same and helps you see how to get better.
Tip: Preheat, stay organized, and check your work early. These tips help you work faster and make fewer mistakes.
Quick Inspection Methods
You need to check your work after bga rework to make sure it is good. Use fast ways to inspect your repair. X-ray inspection shows you clear pictures of solder joints. You can see if there are gaps, bridges, or not enough solder. Endoscope inspection is good for small work areas. You can check if the bga lines up and if solder flows right at the edges. Functional testing makes sure the bga works like it should. Run tests after you inspect.
Here is a table with common inspection methods:
Inspection Method | Description |
|---|---|
X-Ray Inspection | Looks at solder joints, finds gaps, bridges, and not enough solder. |
Endoscope Inspection | Checks if the bga lines up and if solder flows right at the edges. |
Functional Testing | Runs tests to make sure the bga part works right. |
You should also use electrical tests to check the board’s features. Optical inspection lets you see connections with an endoscope. Try to keep voids under 25% as IPC-7095 says. Too much solder paste can make bridges and short circuits. Make sure the reflow temperature stays above 217°C for lead-free solder. These checks help you stop cold joints and keep your repair strong.
Note: Fast checks after placing and testing make sure your bga rework meets the rules.
You can do bga rework fast if you follow simple steps and use the right tools. Good bga stations and the right steps help you fix solder joints quickly. This means you do not have to throw away boards. You also spend less money fixing things. Placing the bga in the right spot, heating it carefully, and checking your work make your repair better. Clean tools and good stations help you control the process. Always read datasheets, clean the pads, line up the solder balls, and check with X-ray to make sure the connections are strong.
Use these quick tips to make your bga repairs faster and more reliable.
Step | Description |
|---|---|
1 | Read the instructions and datasheets. |
2 | Clean the bga pad surfaces. |
3 | Line up the solder balls with a stencil. |
4 | Use the best temperature for reflow. |
5 | Clean and check the finished work. |
6 | Check the quality with X-ray inspection. |
FAQ
What is the fastest way to do bga rework?
You can speed up bga rework by using a modern rework station, preheating the board, and applying solder paste with a single-use stencil. These steps help you avoid mistakes and finish repairs quickly.
How do you avoid damaging the board during bga removal?
You should heat the board slowly and use a vacuum tool to lift the bga. This method protects the pads and keeps the board safe. Always check for nearby sensitive parts before you start.
Why is alignment important in bga repairs?
Alignment helps you place the bga in the correct spot. If you line up the component well, you get strong solder joints and reliable connections. Misalignment can cause electrical problems and delays.
What tools do you need for quick bga repairs?
You need a bga rework station, solder paste, flux, and a microscope. These tools help you control the process and check your work. Good equipment makes repairs faster and safer.
How can you check if your bga repair worked?
You can use X-ray inspection or an endoscope to look at the solder joints. Functional testing shows if the bga works as expected. These checks help you confirm a successful repair.
See Also
Essential Strategies for Excelling in BGA Assembly
Tips for Steering Clear of BGA Assembly Errors
Innovative Methods for Reliable BGA Assembly in Electronics
Ensuring Perfect BGA Assembly Through Effective Quality Management